
KWoC 2023 Report

· 4 min read
Tejas Pandey
Executive

Hello everyone!

The Kharagpur Winter of Code (KWoC) 2023 has come to a close, and what an incredible journey it has been! For those unfamiliar, KWoC is an annual five-week program where students, many of whom are new to open-source software, contribute to coding projects under the guidance of experienced mentors. This program, hosted by the Kharagpur Open Source Society (KOSS) at IIT Kharagpur, is open to students from all universities, creating a diverse and inclusive environment.

The Motivation

KWoC's main aim is to provide students with guidance and mentorship as they take their first steps into the world of open source. It helps build bridges between budding developers and experienced mentors. This early guidance is especially beneficial for freshmen and sophomores, helping them build confidence and skills that will be invaluable for larger programs like Google Summer of Code (GSoC).

How It Works

KWoC has always been an online program, operating through its dedicated website. The process begins with mentors registering their projects. By the last week of November, the accepted projects are listed on the website, and student registrations begin. Students then browse through the projects, select those that interest them, and start contributing.

The Kickoff

This year's journey started with an Introductory Seminar on November 11th, held on Google Meet and livestreamed on youtube.

The seminar covered:

  • What KWoC is all about
  • Eligibility and participation details
  • Benefits for both beginners and experienced coders
  • The program timeline
  • Helpful resources
  • FAQs and live Q&A

Participation Stats

  • Mentor Registrations: Began on November 12th
  • Student Registrations: Started on November 25th
  • Registered Mentors: 107
  • Approved Projects: 69
  • Registered Students: 1393

The Coding Period

The coding period officially started on December 9th. This phase was a hive of activity as students collaborated with their mentors, working on issues, and implementing new features. By December 24th, mid-evaluations were conducted. To pass, students needed to have at least one open or merged pull request (PR) in their project. 133 students met this criterion and moved forward.

Mid and End Evaluations

End evaluations began on January 9th, requiring students to have at least two open or merged PRs. 100 students met this requirement and were asked to write detailed blog reports about their KWoC experience, with a submission deadline of January 15th. These reports, along with mentor feedback, determined the successful participants.

Highlights and Achievements

KWoC 2023 saw tremendous achievements and growth:

  • Projects: 69
  • Mentors: 107
  • Students Registered: 1393
  • Students with At Least One Merged PR: 90
  • Mid Evaluations Passed: 133
  • End Evaluations Passed: 100
  • Blog Reports Submitted: 71
  • Successful Participants: 62
  • Total Merged PRs: 503
  • Total Commits: 1353
  • Lines of Code Changed: +1.01M / -52k

Closing Thoughts

Embarking on an open-source project can be intimidating, especially for those new to coding. It often begins with the excitement of exploring projects and wanting to make a meaningful contribution. However, navigating unfamiliar codebases and understanding project conventions can be intimidating. The key is to break down complex problems into smaller, solvable pieces and to learn progressively. approach not only helps in understanding coding practices but also builds resilience and patience to work on large projects.

Mentor interaction is crucial in KWoC, and while some students faced challenges in communication, many found mentors to be incredibly supportive. The relationship between mentors and mentees often blossomed into a collaborative learning experience, with mentors guiding students through coding practices and project development. We extend our heartfelt thanks to all mentors for their invaluable support and dedication throughout the program

KWoC 2023 has been a celebration of code, collaboration, and community. The success of this edition is a testament to the hard work and passion of everyone involved—students, mentors, and the KOSS team. Certificates were awarded to successful participants, and the top 10 performers will be awarded goodies from FOSS United.

As we wrap up another successful year of KWoC, we're excited to see how this experience will impact the future paths of all participants. Collaboration and learning are at the heart of open source, and KWoC 2023 has been a great example of this spirit.

A heartfelt thank you to everyone who contributed to making this year's event a success.

Best wishes, Kharagpur Open Source Society

Git Cheatsheet

· 6 min read

What is Git?

From Git’s official website:

Git is a free and open source distributed version control system designed to handle everything from small to very large projects with speed and efficiency.

About Version Control

What is version control, and why should you care? Version control is a system that records changes to a file or set of files over time so that you can recall specific versions later. Even though examples in most of the cases show software source code as the files under version control, in reality any type of file on a computer can be placed under version control.

To install Git:

sudo apt-get install git

To check version:

git -- version

For configuring:

git config -- global <keyword> “Data”

  • <keyword> can be user.name ,user.email, core.editor etc.
  • To display current saved configration type git config --list

For help:

git help <verb>

eg: git help config for help regarding configration process

Creating a local repository:

  • Simply cd into the directory you want to track and simply type git init. This will create a .git file in the directory with a basic skeleton without any commits.

To check which files can be commited:

git status

this will list the files that can be commited

  • To ignore files create a .gitignore file using touch .gitignore
  • Open this using text editor and add names of files you want to ignore

Moving files to staging area:

  • For adding files individually use –git add <filename>
  • For adding all files at once use –git add -A
  • To remove files from staging area use –git reset <filename>and to remove all simply type git reset

To commit the files:

git commit

but it is necessary to add messages with the commit to make sure what we did ; so for that we use -m extension like git commit -m “message”

Staging and committing Flowchart.

To check the commit history:

git log

Cloning a repository from internet:

git clone <url> <location>

  • To clone into current directory use .in place of location.
  • To check status of the cloned repository use git remote -v This will give the location from where it is fetched.
  • git branch -a gives all the branches in the cloned repository.

Changing and submitting:

  • Make changes to the file of the cloned repository.Now to see change made type git diff <commit>

This will display the change made with respect to the <commit>. By default if <commit> field is left empty , Git compares it with HEAD i.e the last commit.

Another feature or form of git diff is

git diff --cached <commit>

This shows the diff between your staged changes and the <commit>. So, here it gives the diff between your index and the last commit.

git diff <commit> shows the diff between the current working tree and the <commit>.

  • Now git status will view the modified files .
  • Add the file to the staging area using git add -A.
  • Commit these files with appropriate message .
  • Now before pushing it back . We need to pull and check whether any other person made a change in the branch since the last time type in git pull origin master ( If on master branch else use branch name in place of master).

IMPORTANT NOTE:

git pull is often confused with git fetch .The basic difference is stated below.

git fetch really only downloads new data from a remote repository — but it doesn’t integrate any of this new data into your working files. Fetch is great for getting a fresh view on all the things that happened in a remote repository.
Due to it’s “harmless” nature, you can rest assured: fetch will never manipulate, destroy, or screw up anything.git fetch is also useful when we manually wish to merge or check and merge conflicts that arise whereas git pull* *directly fetches and merges (refer branching for merge). It is therefore more preferred to use git fetch.

git pull in contrast, is used with a different goal in mind: to update your current HEAD branch with the latest changes from the remote server. This means that pull not only downloads new data; it also directly integrates it into your current working copy files.

Now for finally pushing type in –>

git push origin master

Basic process Flowchart.

Branching:

A typical image which represents blue dots as master and rest as side branches.

  • To create a new branch use git branch <branchname>
  • To check all the branches present use git branch
  • To switch over branch use git checkout <branchname>
  • To push a commited changes type in git push -u origin <branchname>
  • To merge the current branch you are working on to master use git merge <branchname>
  • To push the changes we simply use git push origin master
  • To check it they are merged type in git branch --merged
  • If the branch is successfully merged we can now delete the branch–git branch -d <branchname>

To switch to a previous version of the code:

We do git reset <mode> <SOME-COMMIT>(some commit is the commit number ) then Git will:

  • Make your current branch (typically master) back to point at <SOME-COMMIT>.
  • Then it will modify your working tree and the index (“staging area”) according to the <mode> selected.
  • The mode must be one of the following (If <mode> is left blank then by default --mixed is selected) —
  • --soft —Does not touch the index file or the working tree at all (but resets the head to <SOME-COMMIT>, just like all modes do). This leaves all your changed files “Changes to be committed”, as git status would put it.
  • --mixed — Resets the index but not the working tree (i.e. the changed files are preserved but not marked for commit) and reports what has not been updated. This is the default action.
  • --hard — Resets the index and working tree. Any changes to tracked files in the working tree since <SOME-COMMIT> are discarded.

Stashing

Often there is a condition where code is in a messy state and you don’t want to work any further . Also you can’t commit this half-written code. In such conditions function called git stash is used.

  • Type in git stash this will push this code onto a stack while keeping the working directory clean.Further use of this function again and again on the same code will generate a stash stack.
  • To display the stash stack use git stash list .The list will be numbered as stash@{0},stash@{1} ….stash@{n} .
  • Finally when you decide to work again and want to apply the changes use git stash apply . To apply any older stash from the stash stack use git stash apply stash@{n} where n is the stash number.

For Reference regarding Git :

An informal introduction to KWoC

· 9 min read

Great People of tomorrow, every perfume starts with one ingredient but it is the last one that makes it come to life.

Hi! and Welcome! To all esteemed student who are trying to pursue their dreams irrespective of their departments and previous experience.

Everyone is welcome. Here “Everyone” is not a metaphor, “Everyone” means everyone.

Open source is not just “GSoC”. It is a lot about, idea, ego, altruism, expression and satisfaction. From software to hardware to information anything can be opensource. We do open-source because we love to. “GSoC” is just a good motivation to start.

Some famous open source projects:

Firefox, Linux, Ubuntu, VLC.

Now coming back to KWoC, common problems faced and how to be prepared.

Psychological Barriers :- Completing KWoC requires you to overcome a statement “I have just started with coding” or “These are State of Art things,It requires a lot of experience”. I will easily term these statements as myths or excuse.

Why these thoughts arise?

From project info. You will read fancy terms as “Scraping” “Audio-recognition” “Natural Language Processing” “Deep Learning” “Networking” and you will lose your heart. But the matter of truth is that project info tells you just about what that project really does, not about the process how it performs that task. In most of the projects mentioned, you are not going to implement everything yourself and you don’t need to read everything present in the codebase. There are pre-implemented library for most of state of art things, you just need to learn some basic info about how to use these libraries.

Most of the software development is based on basic conditional statements, libraries and lot of common sense.

Mentor Problem:- A lot of time there is a problem in response of mentor. A lot of time mentor doesn’t respond in a helpful way or doesn’t respond at all. Let me tell you a ravishing truth “This phenomenon happens in GSoC as well”. Really you can’t help. Now what, you are in shoes of Robert frost, “Two roads diverged in a yellow wood, And sorry I could not travel both”, either you can become hopeless again and take a road more traveled or you can make it a memorable event where you overcame your mediocrity. Try some other project with similar portfolio. The cycle is shortlist project, talk to mentor, if you find him convincing or if you think you can do project without his guidance then only proceed, then code debug and repeat.Bug co-ordinator, but mark my word if you are bugging anyone it’s your responsibility to respect his/her time, give back your effort or remember that “Karma is a bitch”.

**Ubuntu:-**If you are new to ubuntu, “KWOC is going to be really awesome” . Because you will remember this winter for like 1–2 years, because if you are high on grit you will be going through a lot of learning shit. Okay, Siri is here to your rescue, Ubuntu is nothing like Windows but considering you as a Windows user, Instead of .exe there are other methods to install applications.

Here is some Chinese wisdom for you my friend.

There is terminal in ubuntu (ctrl + alt + t). Here is an important [link] to make you little aware of terminal. Get aware of this blog, terminal is quite important for software development. Here is the **[chest] of all beginner friendly links.How to install software and libraries[link]. You don’t need to learn everything at one go. As you start coding and setting up environment for your respective project refer to these link as per need. If you have not installed Ubuntu then visit this [link]**.

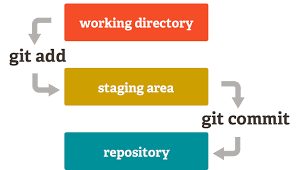
Git:- A command line tool to save different versions of your code wrt to changes. Nothing more or less than that. People have complicated this unnecessarily. It also interacts with Github and Bitbucket.

One of the best places to learn git is Learn Git Branching

Starter pack of git :-

a) If you have installed Ubuntu very recently then for installation of git

sudo apt update && sudo apt install git

b) When you use git for the first time, you’ll have to configure it with details matching with your GitHub profile.

git config — global user.name “ ”

git config — global user.email “ ”

c) If you are behind a proxy server then to configure git to access Github.

git config — global http.proxy 172.16.2.30:8080

d) Then login in your Github account.

This is just a sample. Change URL according to your project. Don’t just blindly copy paste. Read instruction properly.

e) Visit this link Kossiitkgp website repo [Visit your respective project link].

f) On top right of that window click on watch button and pick watching option

g) Beside that button is star, star it as well, then there is fork button, click on fork button.

h) Then you will be automatically directed to your forked window.

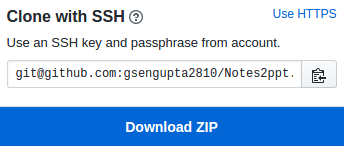
k) Click on that green button of clone or download.

l) When you click there, a menu appears where there is an option to copy link but ensure that you copy the link is in this format

And not in this format:

m) Then press ctrl+alt+t

n)Then enter in terminal “git clone ” and then press ctrl+shift + v and then hit enter (hitting enter is an untold rule).

git clone

o) cd kossiitkgp.github.io [change according to name of your project]

p) Then enter in terminal git remote add upstream and then press ctrl+shift+v

git checkout -b newbranch

r) If you can, edit some files in cloned folder (using git clone)for productive use, save your changes by ctrl + s (if using sublime or gedit etc) .

s) Then properly review your changes then type this command in terminal in already opened terminal.

git add -A

git commit -m “ ”

git push origin

v) Enter your username and password. While entering password you will not see anything

w) Done

x) Then visit https://github.com/your-user-name(plz change)/kossiitkgp.github.io

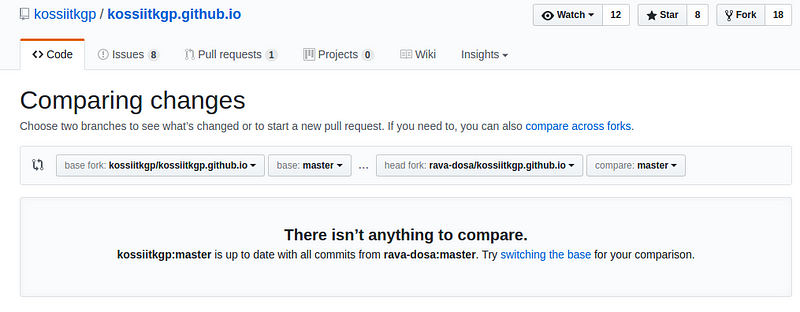
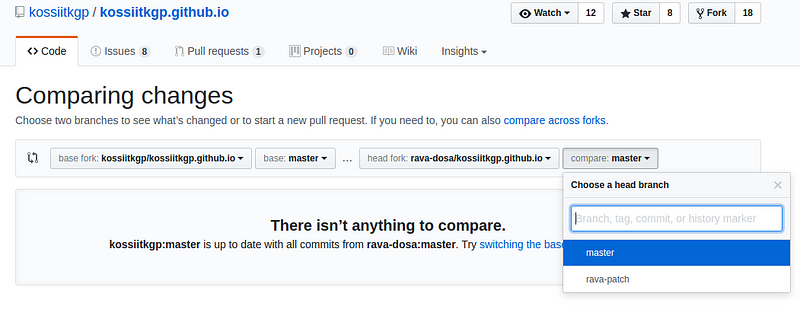
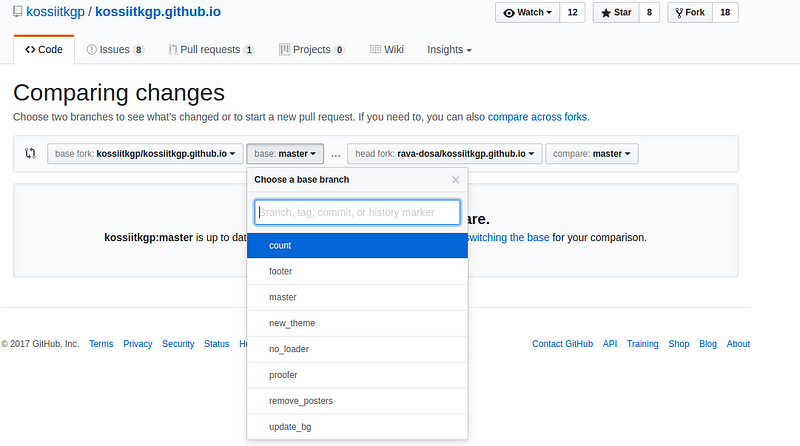
y) Then click on pull request then click on create new pr.(Check two branches which you are comparing)

z) If you are sending pr after few days of cloning then before git push first do

git pull

**(there are other methods as well like fetch and rebase) **or face the wrath of merge conflict.

For proper crisp tutorial read [this].

Github:- It is just a website(like Fb/Orkut) where pull request are similar to Fb’s friend request. It is definitely more productive and useful.

But a more complicated definition

“GitHub is a web-based Git or version control repository and Internet hosting service. It is mostly used for code. It offers all of the distributed version control and source code management (SCM) functionality of Git as well as adding its own features. It provides access control and several collaboration features such as bug tracking, feature requests, task management, and wikis for every project.”

Definitely, it gives a lot more insight only if you understand the terminology :) :)

Reading codebase:- My steps would be:

A)

1. Setup a source insight( or any good source code browser you use) workspace/project with all the source, header files, in the code base. Browsing at a higher level from the top most function(main) to lowermost function. During this code browsing, keep making notes on a paper/or a word document tracing the flow of the function calls. Do not get into function implementation nitti-gritties in this step, keep that for a later iterations. In this step keep track of what arguments are passed on to functions, return values, how the arguments that are passed to functions are initialized how the value of those arguments set modified, how the return values are used ?

2. After one iteration of step 1, after which you have some level of understanding of code and data structures used in the code base, setup a…………………..[source]

B)

  1. Identify why I’m reading code. Could be to understand an algorithm, see different coding style, learn a language, find a defect, figure out a workaround, understand a badly documented feature, know how to extend a feature, make a plugin, discover how to exploit a feature beyond the initial intents, …

  2. Find where to start reading. That could be the main/index file of the application or library, a manifest. Or you could search the code for a documented feature……………….[source]

Googling:- Google any error which comes while development.This [URL] is in different context though. But you can get some idea. If you face any problem while development just translate your problem to words and search, if you are not getting solution reframe your problem and then search again. Before asking anyone perform the above instruction at least two times.

Learning:- Learn what you google. If you are just googling and not learning you are equally dependent as you were before. Here learning refers to mugging.

**Libraries:-**This is the basic difference b/w Windows and Ubuntu , In Windows, we install whole everything to do something but in Ubuntu, we install something to do a lot of thing. A minimalistic approach towards development.

As one of the member of open-source community, I would like you to introduce to its manifesto

We need to take information, wherever it is stored, make our copies and share them with the world. We need to take stuff that’s out of copyright and add it to the archive. We need to buy secret databases and put them on the Web. We need to download scientific journals and upload them to file sharing networks. We need to fight for……….[source]

Collective intelligence — multinational, multiagency, multidisciplinary, multidomain information-sharing and sense-making — is the only means of obtaining near-real time understanding of complex systems sufficient to achieve resilience in the face of changes. Many of these changes, including biospheric ones such as climate change and depletion of planetary resources, are the result of human activity and industry in the last three centuries.[source]

In a more beautiful way

“Beneath the mask, there is more than flesh, there is an idea and ideas are bulletproof”

With Love From:

Kharagpur Open Source Society

Writing Kickass READMEs

· 9 min read

Writing documentation for code is extremely important. Alas! I realized this late. Nevertheless, you should not make this mistake again.

This is written with respect to software related READMEs, if you want guidelines for other stuff, then probably this isn’t the right place.

Let’s discuss the potential problems of not having a good README:

Not a clear description of the project

I don’t recount how many times this has happened with me. I usually just scroll through all of my friends’ projects on GitHub to see what they are upto these days and time and again I have been disappointed by not seeing a good description about the project and it is too time consuming to read the whole source code to find out what that repository is actually doing.

In fact some professional projects too have vague description and you are left clueless as to what the code does. Sometimes the project is so big that they can’t really mention all of it in one thing. That is the time you should probably split it in many repositories or folders (if you desperately want a big mono repo like Google) and each folder should contain some high-level information of what the code inside it will do, just like recursive Makefiles.

Not having a installation guide (or an incomplete one)

So since you have got the viewer interested in trying our your software by writing a good introduction, you would now probably piss off her by sucking at writing an installation guide.

What a developer should understand is that since your development environment is setup to run that code, doesn’t mean everybody’s is. One should always write the whole installation process for all systems that the software supports and it should clearly mention that the software doesn’t really have support for this system but it would be great to support it in future or something.

For unix-based systems, one should list out all the ways to install the software. Let’s take an example of Ubuntu. If you have managed to get your software packaged with a .deb file and also uploaded it upstream so that it can be used with apt-get, then that’s just awesome!

Sometimes you might be releasing it and then packing the source code in a tar.gz format, still awesome. In the latter case, it would be worth while to mention all of the dependencies required. Also, just the name isn’t enough, their exact version numbers is even better because you might never know when a python code breaks because of the version bump because well that’s how things work in python world.

If you are expecting the user to do a gcc based compiling for each source code file then God just forgive you. It is time to move on to at least Makefiles to automate that process for you.

If something doesn’t work in particular systems, it is important to list it out.

No User Documentation

You don’t have a user documentation? Well then how do you expect others to use your software. User documentation should be in another file or folder (if it is quite big) and should probably be in some kind of a format which can be rendered easily. You can either write it in markdown format or in Github wiki’s so that it can be easily read on GitHub or you can write in man pages form for the oldies to read it. But you should have it. And that’s not it, your README should explicitly point out to the documentation and also tell the user how to access it and actually read it.

Also you can include the very basic use case in the README itself.

No guide for people to actually contribute

If you have the viewer till now and she is thinking of actually contributing to your project, then kudos, your project is awesome.

A very important part of the contributing guide is to setup the development environment. Again in this, it is worthwhile to get into the platform specific information. For eg. Windows will have different development environment while Ubuntu will have a different one. You should mention what IDE you used or the tools that you used.

Now your project might have some development related dependencies. You should mention about that too. Now finally the viewer can have successful environment setup to actually contribute to your code.

Now, you might be following some conventions for writing your code, right? It is worth while to mention the conventions that you have followed in a separate file and link it in the README.

Then you would have a specific way or two in which you accept others’ code, right? You might be using Github’s Pull Request based system or the age old sending patches via email using git-format-patch and git-send-email just like old times. Whichever you prefer, it is important to specify this in a new file possibly named as CONTRIBUTING GUIDELINES or something. If you have any specifics about the project mention it there. Don’t just expect people to know it by default.

It is also worth while to link the easy to fix bugs for new comers so that they can get familiar with the code base without trying to mingle with the core parts of the software.

No technical documentation

If you are having a big project, then you might be having a “core” part which is used by other parts of code. Have you documented it? Or you just expect people to git-grep and git-blame to find the relevant use cases, definition of the functions and the documentation inside the commit messages? If you are doing that, it is not exactly bad (I understand you might be having your own reasons) but it is good to write a technical documentation wherein you will tell the programmer what a method does and how to use it. This will also make sure she doesn’t write a method to do the same stuff again and thus it would reduce your redundancy.

No mention of how to run tests

Of course you project has tests, otherwise how can you make sure that by writing new code, you don’t break the old code? Your README should contain how to run the test suite. There are tons of different test suites available in the market and it is time consuming for people to check out your test framework and make guesses as how one could probably run it. You should mention how to run individual tests, the whole test suite, and how to skip some tests, and if your test suite framework doesn’t support all of these features, then maybe the one you are using should be replaced.

No license

Yes, legal matters are important too! Whether you are releasing it as an truly open-sourced software with BSD license or something else, you should mention it. If you don’t realize the importance of licensing, that is maybe because your project isn’t big enough. Once a lot of people read your code, use it, they might try to finger with it whether you like it or not. You should explicitly specify “how much fingering” you can tolerate in a separate file named as LICENCE in full detail like a legal document and if you are using a popular license, you can just mention the name in the README.

No place to mention about bugs

You don’t have a bug management system? Okay, I agree this isn’t really always required but if you do, you should explicitly mention and link to that. If you talk about bugs in GitHub issues, then mention it there. Also if you are using GitHub, use labels to specify the bugs. If you still track bugs using emails via mailing list, specify that too also include a link to the old archives of the mailing list.

No mention about the version control system

Well if you are seeing the project on Github, is it wrong to assume that it uses git? Yes, there are many projects that I know use multiple version control systems and the best example is nmap. They accept patches (and PRs) in all forms and integrate it together. So explicitly mention about all the version control systems that you would be using and how you would accept foreign code for each.

No contacts

How should the viewer contact you in case he needs something or has something for you? Probably now you have a good incentive to give out your contact information (mainly email is good) for others to contact you or just say “Thanks for the awesome software!”.

No fancy GUI pictures

You probably would have spent a hell lot of time in designing and tweaking the GUI and were frustrated when a font size looks bigger than it should, so you should show it off. There are lots of people who like the fancy GUI way of software rather than the good old black terminal with green text. If you have a fancy GUI, try and put the pictures of it in the README. GitHub’s markdown renders it, but I don’t think man pages do. But if you really care about man pages, you probably won’t even have cared enough to make a fancy GUI.

No table of contents

Well if you try to write everything that I have pointed out, then it is probably good for you to follow this advice too. Have a Table of Contents. This way, the README will look more organized and it would make reading much easier.

Okay, now that I have ranted a lot, I hope you know How to Write KickAss READMEs.


This article originally appeared in Pranit Bauva’s website.

Breaking Github Down

· 3 min read

During my mid semester exams, one night I was getting bored so I decided to check how to break the most used code hosting website GitHub. I wrote a script[1] to add infinite commits to a repository named “Commiter”[2]. It added a dot at the end of a text file after every commit. The script pushed to the master branch after every 10,000 commits and then after 1,00,000 commits it deleted the repository and then cloned it back with just the last commit. I had to do it because after a large number of commits the directory size was quite large(approx 7–9 GBs).

With the help of this script I was able to find three bugs on GitHub after which they blocked my repository[2] .

  1. Z-index for commit label of contribution graph was not proper :

Below is the screenshot of the issue I am talking about.

Issue #1

The label for the commit number should be above the graph. I got the following response for this issue.

Reply for issue #3

2. Latest commit info was not loading :

After some days the I noticed that the GitHub was failing to load the latest commit information on the repository homepage.

Issue #2

And for this issue I got the following reply.

Reply for issue #2

3. Contributions graph failing to load :

According to me this was a major bug. The contributions graph stopped loading. It showed the below screen for hours and then the page said “Failed to load contributions graph”.

Issue #3

Sadly this was the last issue I was able to track. After reporting this people at GitHub disabled access to my repository. The reason stated by them was :

The repository you’re inquiring about, DefCon-007/Commiter, has been deemed abusive to our system and we have disabled it.

Large numbers of commits do not lend themselves well to versioning with Git and performance issues with a repository of this size can endanger the availability of your repo as well as other user’s repositories. Additionally, the pattern of your commits is very different than that which Git was meant to handle, and therefore consumes far more resources than a normal Git repository of its size.

And at the end they clearly mentioned that the repository access will not enabled again.

P.S. : I was able to reach around 6,567,567 commits.

So this was my story how I used my mid semester exam frustration to do some mischief with GitHub.

References :

[1] https://github.com/DefCon-007/Commiter-source

[2]https://github.com/DefCon-007/Commiter